# Create the Data Interface Automatically
## Connect to the Ec\_Vault database and create the Data Interface
1. Log in to the Autodesk Vault client.
2. From the Vault Professional client *Tools* menu, open *ERP Connector* -> *Configuration*. An empty ERP Connector configuration window will open.
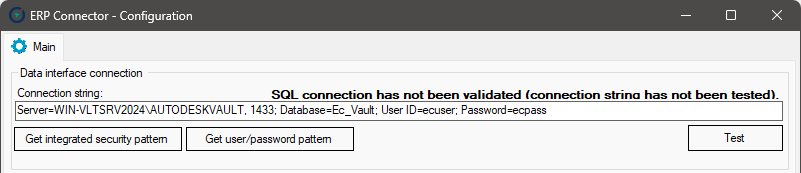
3. Click the *Get user/password pattern* button to fill the *Connection string* field with a sample connection string containing a server identification, database name, user ID, password, and a timeout value.
4. Modify the connection string to connect to your SQL server and database using the correct credentials. An example for the *Ec\_Vault* database and the *ecuser* user is in the image below.
1. Versions of the ERP Connector built on .NET Core technology (released after May 2025) must contain the following information at the end of the connection string: `TrustServerCertificate=True;`
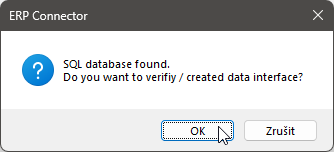
5. Click the *Test* button. A message box should pop up informing you that the SQL database was found and asking you to create/verify the Data Interface.
If you received an error message, verify the connection string contains correct values, check the user permissions, SQL settings, etc.
6. Click the *OK* button. You should see a message box informing you that the Data Interface was verified successfully.
1. If you received an error message, check the user permissions, SQL settings, etc.
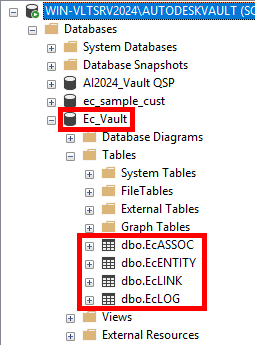
2. After this step, nothing changed in the ERP Connector configuration window, but in the Ec\_Vault database, four tables were created: `dbo.EcASSOC`, `dbo.EcENTITY`, `dbo.EcLINK`, and `dbo.EcLOG`. In other words, the Data Interface tables were created.
7. Click *OK* to close the message box.
8. Click *Save* to save the configuration and close the ERP Connector configuration window.
{% hint style="info" %}
If your database name is different than *Ec\_Vault*, you will need to create the data interface tables manually using script. See the section [create-the-data-interface-manually](https://help.besmart.software/erpc/quick-start-guide/data-interface-creation/create-the-data-interface-manually "mention").
{% endhint %}